

2013 Tomb Raider Cosplay Tutorial Tank Tops Part 2
First of all I have to give credit to the amazing website Laracroftcosplay.com where I got most of my concept images from. They have a wealth of information, and I am simply adding to what they have. I will also be inserting the images I found most useful throughout. Welcome to 2013 Tomb Raider cosplay tutorial tank tops part 2.
Materials:
- Tanks and bra from part 1
- Black tea (3 or 4 bags)
- Espresso brown acrylic paint
- Medium paint brush
- Grey fabric dye
- Large pot
- Mixing bowl
- Medium grit sand paper
- Wet coffee grounds
- 2 shades of dark red acrylic paint
Before we get to weathering I will go over how I achieved the perfect blue grey (it’s quite simple) for my tank top. If you already have the perfect color just skip over this bit. You will need to get out the grey fabric dye that you purchased. I used RIT brand powdered dye, but any should do. Simply follow the instructions on the box. I only left my tank in for 10 minutes and ended up quite happy.
 Now on to the weathering. We will begin with the bra and white under tank. First we want to get them to that dingy worn and sweat covered color. They best way to achieve that is to grab a large bowl you don’t care about and heat some water in it (enough water to cover the tee and bra). Next you want to stick 3 or 4 black tea bags into the bowl and let them steep for a few minutes. Remove the bags and add a touch (a small squirt) of a darker brown acrylic paint. I used an espresso color that work nicely. Mix the paint in very thoroughly and then submerge your tank and bra. I only kept mine in for 20min or so.
 Once you take them out go ahead and rinse in the sink so they don’t smell like black tea forever. They should be a nice dingy yellowish color. Like they have been sweated in and left out in a rain storm (gross I know). I actually did this same treatment to my blue tank but it didn’t really affect it, so I would recommend that you don’t bother.
I took some medium grit sandpaper and did some light sanding on the tank. Mine were brand new so they needed some help looking a little more worn.
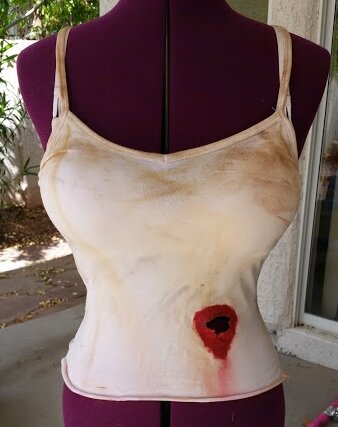
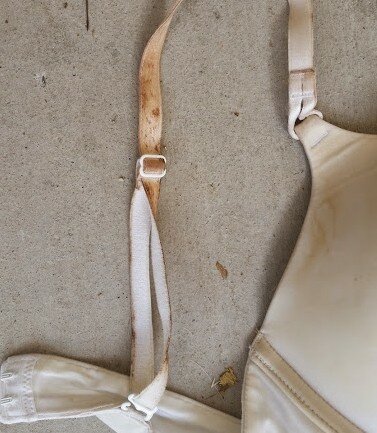
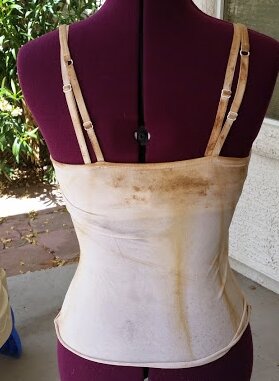
The next step in weathering is the wet coffee grounds. These are going to mimic dirt being ground into Lara’s clothing. I used the grounds everywhere. I made some spots darker than others. I made sure to really get the bra straps, and the top seam and straps on the white tank. You can see in the photo here the effect of the grounds.
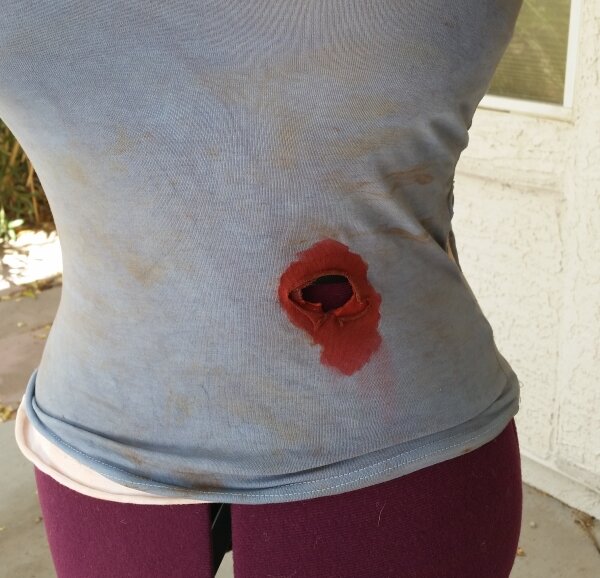 The final step in this Tomb Raider cosplay tutorial tank tops part 2 is the blood. As we know, Lara gets impaled with a piece of rebar and a hole results in her tank and stomach. To mimic this, blood is needed. I created a decent blood effect using two different darker shades of red acrylic paint and a little water. You don’t want to use acrylic paint straight onto the tanks unless you are doing a dry brushing effect or something. I decided to get an authentic blood dripping effect that I should put both tank tops on while painting the bloody spot. I will admit this did work out quite well but was also messy and I am not 100% sure it was necessary.
So with both tanks on I took a paint brush and started to soak the very edges of the hole and very slowly radiated outward a bit. I then poured a bit of the mixture onto my bare skin in the center of the hole so it could run down as if it were really bleeding. The effect it achieved and looked quite authentic.
You can find the rest of the Tomb Raider cosplay tutorials here.
Latest posts by Jen (see all)
- 2013 Tomb Raider Cosplay Tutorial Tank Tops Part 2 - June 5, 2015
- 2013 Tomb Raider Cosplay Tutorial Tank Tops Part 1: - June 4, 2015
- 2013 Tomb Raider Cosplay Tutorial Pants Part 2: - June 1, 2015