

2013 Tomb Raider Cosplay Tutorial Tank Tops Part 1:
First of all I have to give credit to the amazing website Laracroftcosplay.com where I got most of my concept images from. They have a wealth of information, and I am simply adding to what they have. I will also be inserting the images I found most useful throughout as well as any helpful links at the bottom. I have broken the tutorial into 2 parts so that you don’t have to read on and on. The Tomb Raider cosplay tutorial tank tops part 1 will consist of how to obtain the right color and shape and the beginning of weathering.
Materials:
- Fitted white spaghetti strap tank
- Fitted light blue/grey spaghetti strap tank*
- White bra (that you don’t mind getting dirty)
- Craft knife
The very first step is to source your tank tops. This is the part that takes the longest, so make sure you give yourself plenty of time. The white tank is fairly simple. You want it to be very fitted since it will be underneath the blue tank. I opted for one that had a built in bra with padding just to give my Lara a little extra umph in the chest department. The blue tank took a lot of time. I ended up finding the perfect one on Ebay, but I bought 3 more at various stores as back up in case that one didn’t work out. My perfect one was Jay Crew and I only paid like $5 for it on Ebay.
 You’ll want it to be a fitted spaghetti strap, light blue with a grey tint to it. If you cannot find one with the grey tint, opt for baby blue and you can add the grey tint yourself later. I also decided to buy a white padded bra (depending on existing chest size the padding is optional). This bra will end up quite dirty so you will want it to just be your dedicated Lara Croft bra.
The first step after obtaining both the tanks and the bra is to try them all on together to make sure they work. You want the tank to just peak out of the top and bottom of the blue one (it’s ok if it doesn’t). My white tank was way too long so I ended up cutting it, which was a good choice. If your tanks are too long you will end up hiding your belt which doesn’t look as authentic. You want to at least be able to see some of the belt.
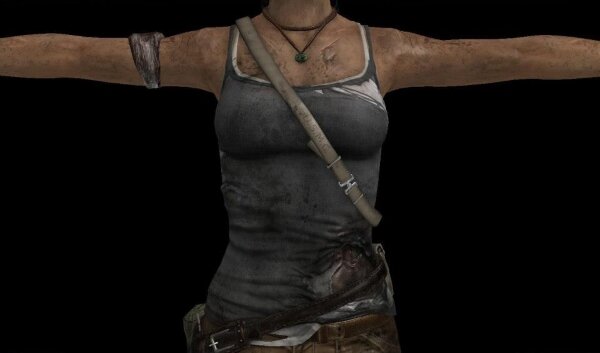
Front of in game tank.
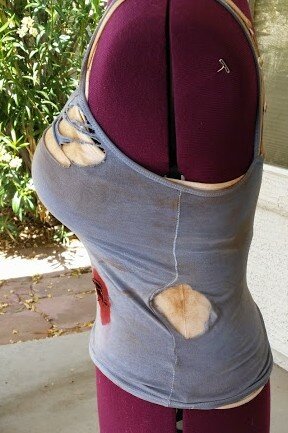
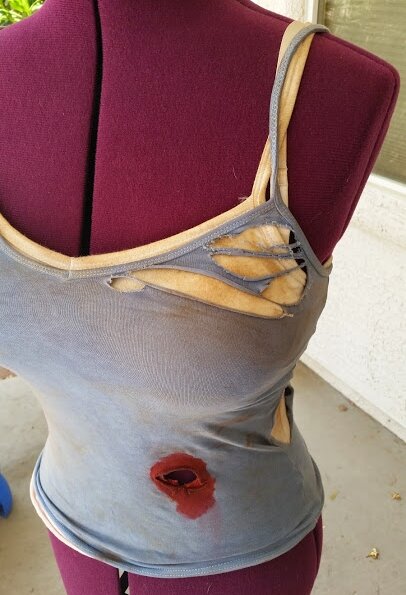
With the tanks still on, you will want to refer to the in game images above and below and decide where you want your holes to go. Just make the areas with a light pencil mark so you know where you are going to cut and rip. You want to do this with the tanks on because a hole that looks somewhat small with the tanks off will look much larger when you put the tanks on. Once you have made your marks go ahead and take the tanks off.
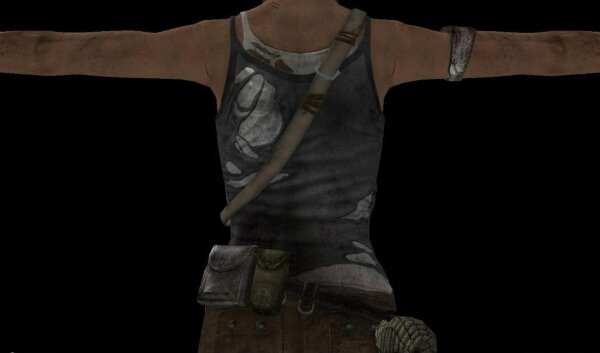
Back of in game tank.
You will want to use your craft knife to start your holes and then rip them by hand. Be careful when you rip by hand. You don’t want to make it too big. Try to think of what might have ripped your tank in that area (tree branch, knife, etc) and mimic the way that item would rip. That is how I did it anyway, I tend to way overthink the details when I cosplay so it’s ok it you don’t go that route.
Here’s my other Tomb Raider cosplay tutorials.
http://laracroftcosplay.com/HelpWithOutfits/reborntanktops.html (video I watched prior to starting my tank tops)
http://laracroftcosplay.com/HelpWithOutfits/howtomake.html#codeword1 (the website where I got most of my reference photos from, they are a great resource)
Latest posts by Jen (see all)
- 2013 Tomb Raider Cosplay Tutorial Tank Tops Part 2 - June 5, 2015
- 2013 Tomb Raider Cosplay Tutorial Tank Tops Part 1: - June 4, 2015
- 2013 Tomb Raider Cosplay Tutorial Pants Part 2: - June 1, 2015